How To Make Custom Autorun For Your Own USB Drive
If you’re like most flash drive enthusiasts, the topic of the notorious ‘Autorun.inf’ is bound to come up at some point when working with data customization. The purpose of this file is a mystery to most computer users, however it is the cornerstone of any automated task(s) that should occur once the drive is inserted, hence the file name ‘Autorun’.
Autorun is able to change these (and I will show you how in a minute):
- Which file or executable should be opened once the USB drive is plugged in.
- Your custom icon of choice whenever a user sees the USB drive listed within Windows Explorer.
- A custom name for your USB drive as shown in Explorer, only up to 12 characters.
- Options for the menu shown whenever you right-click the USB drive icon.
One thing to remember with this drive feature is that it works only on machines with the versions of Windows after 98 but before Vista, such as 2000 and XP. This is because previous versions of Windows did not include the drivers for USB. Newer versions of Windows like XP SP3 and Vista began disabling autorun as a security precaution against malware. Obviously, in these scenarios any features using autorun with a flash drive would fail massively.
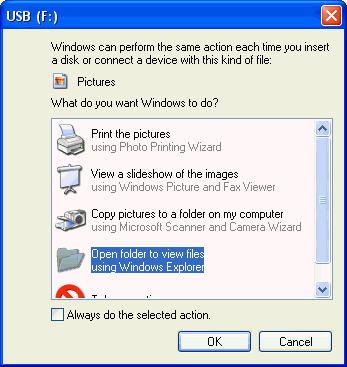
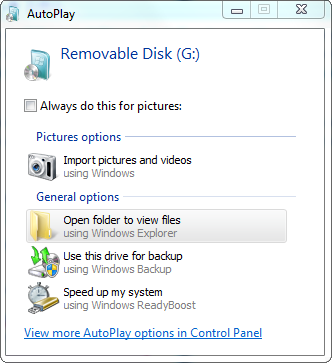
When you plug in a flash drive on a Windows system that recognizes it, if there is no custom autorun by default you will see a lame pop up window such as one of these:
Windows 2000/XP –
Windows Vista/7 – (cannot be changed unfortunately)
For 2000/XP you can customize your drive’s behavior by creating an ‘Autorun.inf’ file. Do this by simply right clicking in your flash drive directory, choose ‘New’ and then ‘Text Document’. Rename the file by hitting ‘F2’ or right clicking the new text file and choosing ‘rename’, then change the name to ‘Autorun.inf’. Yes, it has to be called this exact name or your custom autorun commands will not work. Windows will check the root of your flash drive for this exact file and follow its commands if it is there.
Now you must enter your commands for this file. It is still technically a text file, so you can open in notepad and it should do this automatically on most systems if you just double click the file.
The Ropes:
All ‘Autorun.inf’ files must start with:
[autorun]… which basically informs your computer that this is, indeed, autorun. (facepalm) You will now just need to hit enter to the next line as all of autorun goes by commands on a line by line basis. So on the next line…
The command to run a file is:
open=example.exe… where
example.exe should be your file of choice, be it a .exe, .pdf, .ppt, or .doc, any type of file will be opened upon drive insertion. The file can be named anything (within reason) as long the exact same file name is put here.
The command for a custom icon is:
icon=example.ico… where
example.ico is your custom icon of choice. You can also name it whatever you like as long it keeps the .ico extension and has the right name in the autorun file.
The command for a custom drive name is:
label=example drive… where
example drive is your custom name of choice. Please bear in mind that due to volume name restrictions, you can only use names with up to 12 characters total.
The command for adding your own context menu item is:
shell\example=Testing 123

shell\example\command=example.exe
… where the first line defines the item (
example) then the text to be displayed in the menu (Testing 123).
The second line tells the computer what to open on clicking that menu item. In this case, it is example.exe.
Also don’t forget to include the name of your command from the first line (example) in the second line right after shell\. Doesn’t have to be example, it can be whatever you want, within reason. The really cool thing is that this pair of lines can be repeated for as many menu items you wish to add! Just be sure to name your items differently so they aren’t repeated twice, which would likely cause menu item failure.
So an example of a custom autorun would all go together like this:
[autorun]

open=example.exe

icon=example.ico

label=example drive

shell\example1=What is this product?

shell\example1\command=what.exe

shell\example2=How to Order

shell\example2\command=order.exe
Wrap Up:
That’s all there really is to it! Easy, right? Just remember to save in notepad and copy the file to the root of your USB flash drive if you haven’t already and test it out on a compatible operating system. Hope you found this little article helpful and amusing. Have fun with your own custom autorun!